That Bomb has a Nice Ring to It! ~ Pearl Bath Bombs


https://pearlbathbombs.com/

https://pearlbathbombs.com/


Hey Love Buds!

Before I went on hiatus, I was asked to give my opinion on a wonderful new product.  Tessa, the owner of Pearl Bath Bombs reached out to me to collaborate on testing and promoting these awesome "pearls" of joy.  Since then, Pearl Bath Bombs have been reviewed, praised and promoted by media outlets far greater than my little blog, but a promise is a promise and I did receive this gem in exchange for my honest review and by golly, even though this is six months late, I am going to post my review.

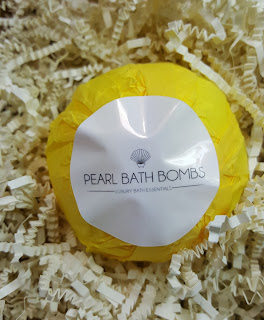
So, Pearl Bath Bombs are of course bath bombs, like most, they act as huge alka seltzer tablet for your bath tub, fizzing and bubbling to soften, scent and add bubbles to your bath.  However, these bath bombs all include a sparkly surprise inside!


Each bath orange sized bath bomb includes a ring and the chance to win a ring worth up to $5,000.

I am not an avid bath enthusiast, but to be able to give my opinion on a product, I've got to use it and I must say my bath with a lemongrass scent Pearl Bath Bomb was pretty refreshing!

The lemongrass scent was sweet and citrusy, I really enjoyed it and it left my bath water looking like this:


Since my bath bomb was for promotional purposes, the ring was not included.  None the less, my bath was fantastic, the whole bathroom was filled with yummy fragrance.

I really like that everyone is a winner with Pearl Bath Bombs, even if you don't qualify for one of the high value rings, you still receive Pearl Points that can be used to redeem additional bath bombs.

One aspect of this item I'm not crazy about is that you cannot choose the size of the ring included in the bath bomb you purchase.  Its a bit of a bummer to receive a cute ring but it doesn't fit at all.  Other than that, I highly recommend Pearl Bath Bombs, they are a great way to treat yourself and they make great gifts.

These are pretty large, about 4 to 6 ounces and the prices run from $14.99 to $24.99 (which is for a bath bomb called "The mother of all dragons", a tribute to TV series Game of Thrones), with packs of three or five offering a nice discount.

I'm off to make more soap, going to work on a project for Brambleberry's #soaptherainbow campaign.

Until next time,

Peace, Love and lots of yummy, citrusy, sparkly Bubbles!

A.

  
 Visit Pear Bath Bombs:

Soap Chronicles Vol I. Five things I've learned so far


Crazy Soap Scientist Profile Pic, LOL

What's up Love Buds?

So, I've been soaping for several weeks now, loving it and learning a lot.  It's been a blast, even with some of the awesome failures I have had.  So what have I learned this month when it comes to making soap?

Lesson 1: Swirls are not as hard as I thought


Voodoo Soap ~ 4theloveofbubbles

When using a well calculated, slow to trace soap recipe, the possibilities are endless. I've been swirling my heart out since the blueberry soap fiasco with my first attempt soap making.  The tops of my soaps are swirltastic and the insides are looking swirlicious!


Lesson 2: Know your mold, start small

The above soap came out gorgeous, except for one thing, I didn't calculate the batch properly and was not able to completely fill the mold with my batter, which means the soap had to be cut wider than I wanted to give the same amount of soap.  I'm using silicone molds at the moment because I'm not feeling the lining of wooden ones.  It may be something I need to do if I become a serious soaper, but I'm not crossing that bridge unless I really need to.  *Silicone molds are flimsy and easy to unmold, but if you plan to relocate it from where you made your soap to a different curing location while the soap is still some what liquid, use caution and soap on something sturdy that you can use as a base to relocate the mold (I found a cutting board works well).  I have first hand knowledge of the gut wrenching after effect of creating a beautiful soap and then sloshing it all over the floor trying to put a flimsy mold on the curing rack.

I started making soap using a 40 oz mold I received with my kit from Bramble Berry, but that is way too much soap to experiment with.  I purchased a couple of 1 pound molds as well as some individual soap bar molds so that I can make smaller batches.  By cutting my batches in half, I can make twice the attempts with the same amount of materials.  It makes a HUGE difference.

Lesson 3:  Be up to the challenge

Challenges like the teardrop swirl by Great Cakes Soapworks are great ways to test your skills and try something new.  I wasn't apart of the official challenge, but seeing Youtube videos about it prompted me to make an attempt and I did a pretty good job!

Olive Juice Soap ~ 4theloveofbubbles

Lesson 4: Don't be discouraged

The beautiful creation above was my second attempt at this process.  You can see my first attempt at cold process soap in about seven years here.  My first attempt at a teardrop swirl wound up looking like this:

Femme Fatale ~ 4theloveofbubbles
Now, it still turned out to be a great soap, but the batter seized up on me pretty quickly.  Which brings me to next lesson.... 

Lesson 5: Research, plan ahead and be ready for it to all go left!

If I had refreshed myself on this fragrance oil prior to starting, I would have known it has a tendency to accelerate trace.  Read up on the properties of all of the ingredients you are going to use, plan and prepare.  But, stay calm when something unexpected happens and work with what you got.

I was trying wheatgerm oil in my soap and planned on trying a hanger swirl (which is not something you should plan to do with an unpredictable recipe) - the batter seized immediately, I could barely plop it in the mold and twirl the end of my spatula through the batter a couple of times before the soap set up and the colors were not as vibrant as I wanted, however this soap came out gorgeously.

Pink Bling ~ 4theloveofbubbles

There are several things I've noticed that I need to work on, but that will be a story for the next soap chronicle!  In the meantime, as I produce and cure soap, it will be made available for sale.  The bars will be between $3.99 and $5.00.  Each batch is only 2 to 6 bars of soap and as I continue to say, my journey is about exploration so re-doing batches probably won't happen (maybe for the holidays...we'll see).  I'd appreciate your support as I continue this journey and of course I want your feedback on anything you choose to acquire.  All of my creations can be found here.

If you're not on my e-mail list, you can sign up here.  Email subscribers will be receive monthly updates on new blogs, items, contests and special promotions found nowhere else.

Until next time,

Peace, Love & loads of glorious, gorgeous Bubbles!

A. 


Pink Ginger Lime Salt Bars - Recipe

(reposting, had some technical issues with my blog)

Hey Love Buds!

The July challenge in my DIY Facebook group is to make a detoxifying scrub.  Really simple, for this challenge you can pick any ingredients and any type of scrub the only requirement is that at least one of the main ingredients is a detox agent.

Now I know, you can't make claims about a product actually changing the condition of your hair, skin or body without FDA certification, but these detox items are not being made for the retail market and therefore, the challenge is proceeding with the creator's own research and understanding of this criteria.


courtesy www.helloglow.co
 Hello Glow has a bunch of brilliant DIY recipes and one that caught my eye as an example for this challenge was the ginger detox scrub

I will also participate in each challenge and send the chosen winner the product I created as a prize.  However for this month's challenge, I'll be sending up to 3 participants my entry for this month's challenge!

What did I come up with for the July Challenge?

Pink Ginger Lime Salt Bars!

The detox ingredients for this recipe include pink himalayan salt, grated lime and ginger.  Usually fresh food additives are not recommended in soap recipes because they may cause the soap to develop Dreaded Orange Spots (DOS), which is a sign of rancid oils - the soap is still ok to use, just doesn't look as nice and if there is enough DOS it may change the smell.  However, the high salt content of these bars acts as a preservative to the very small amount of shredded ginger and lime.

This is a cold process soap, if you are unfamiliar with how to make cold process soap, please check out this free beginner's guide to soapmaking from the Soap Queen that introduces cold process soap making or try to attend a soap making class locally.  Safety is paramount when working with lye.


RECIPE:
I'm sorry I did not take any pictures of this process, I will do better next time!
Yield about 25 ounces of soap which fits in a one pound soap mold with extra to make sample bars in 2 to 3 individual 3 oz molds.

12.80 oz Coconut Oil
2.4 oz Olive Oil
.80 oz Mango Butter
4.8 oz distilled water
2 oz coconut milk
2.36 oz Sodium Hydroxide (lye)
1 oz ginger lime fragrance oil
14 oz fine grain pink himalayan salt

Soapmaking tools (bowls, spatulas, swirl tools, scale, thermometer, rubber gloves, goggles, apron, closed toe shoes)

OPTIONAL ITEMS
1 tsp grated ginger
1 tsp grated lime peel
1 tsp aloe vera 100x powder
1 tsp sodium lactate
pinch of silk fiber
tsp of chromium oxide dispersed in a tablespoon of thin oil (green)
tsp of bright yellow raincoat mica (from Mad Oils) or other bright yellow mica dispersed in a tablespoon of thin oil (yellow).

If you know anything about soap making, too much coconut oil can be irritating to skin and there is not a lot of other moisturizing oils to help this batch.  However, salt is a lather killer and coconut oil creates lots of bubbles, so the coconut heavy recipe helps to maintain some lather.  While the silk, coconut milk and aloe vera provide some skin conditioning properties.

Step 1: To use coconut milk, I freeze it in ice cube trays, then put them in a bowl and add the lye to create the lye solution.  But, to decrease scalding of the milk (some is needed to superfat the soap after trace), you can use 4.8 oz of water to make the lye solution.  I also add the silk fibers to the solution and stir ensuring they have all dissolved and set aside.  

Step 2: Combine and warm oils and butters in a separate bowl until everything is liquid.

OPTIONAL STEPS: While you wait for the next step to happen, here are some optional steps.  Warm the coconut milk a bit and add the aloe vera powder and sodium lactate.  Prepare your colors if you haven't already.  Make sure to have a separate container to mix each color into your soap batter.  I used 3 one for some uncolored soap, one for yellow and one for green.

Step 3: When both the lye water and liquid oils/butter reach between 90 and 105 degrees (and are within about 10 degrees of each other) Add the lye solution to the oils (never the other way around) and stick blend to a THICK trace.  Thick trace is necessary to keep the salt suspended.  

Step 4: Once you reach thick trace, add 2 oz of liquid coconut milk and mix until incorporated.  Add fragrance oil and mix until incorporated.  Using a spatula to mix, slowly add in your pink himalayan salt and optional grated ginger and lime.  Once fully mixed in, separate batter into containers for coloring.  Add the colors and mix well.

COLOR/MOLD/SWIRL: For my color combination, I poured the uncolored batter in the mold first.  Then I poured the 2 colors in simultaneously down opposite sides of the mold until full.  I used a gear tie, which is great because you can bend it to fit the mold, to do a hanger swirl.

Sodium lactate really helps to have them come out of the mold smoothly.  I did not include it in my first batch and I tried to unmold too soon....too, too soon...

That was a lot and pretty complicated for a non-soap maker.  But this month's challenge does not have to be soap - it just has to be an exfoliant with a detox ingredient.

To qualify to win one of my Pink Ginger Lime Salt Bars, there's still time to participate in the July challenge.  The rules and details are in the Facebook group, just send a request. to join. 

That's all for now Love Buds.  Until next time ~

Peace, Love & Lots of tangy exfoliating Bubbles!

A.  

Feature Friday: Chocolate Soap by Soaping 101

(reposting, something went screwy with my last few posts.  Just in case you missed my Ginger Dextox Scrub bar post, you can find it here)

Hey Love Buds!


Today's Friday and it's time for another feature video.  This week's tidbit is from Soaping 101.

The soap created in this video is made from chocolate!  Yes, real chocolate, chocolate soap.  I...I just don't need to say anything more because - chocolate.  Check it out:


Now what could be better than bathing in actual chocolate?  I know it will take a minute to respond to that.

What other foods do you like in your soap?  I really want to know, especially now that I am making soap.  Speaking of, today will be awesome because I will receive #bubblelove packages from Petals Bath Boutique, Alamo Candeleria and I think one other soapmaker, plus I'll be binging on "Orange is the New Black".  But this weekend, I'll be making more soap and working on my July DIY challenge project.  AND next week, I'll have an update for you on my soaping adventures.  Great things will be happening this weekend.  Stay tuned for what's coming!

Peace, Love & Loads of chocolately good BUBBLES!

A.


Visit Soaping 101:
     On the Web
     On Youtube
     On Pinterest
     On Facebook
     On Twitter

Recipe: Ginger Detox Bath & Body Scrub


Hey Love Buds!

The July challenge in my DIY Facebook group is to make a detoxifying scrub.  Really simple, for this challenge you can pick any ingredients and any type of scrub the only requirement is that at least one of the main ingredients is a detox agent.

Now I know, you can't make claims about a product actually changing the condition of your hair, skin or body without FDA certification, but these detox items are not being made for the retail market and therefore, the challenge is proceeding with the creator's own research and understanding of this criteria.


courtesy www.helloglow.co
 Hello Glow has a bunch of brilliant DIY recipes and one that caught my eye as an example for this challenge was the ginger detox scrub

I will also participate in each challenge and send the chosen winner the product I created as a prize.  However for this month's challenge, I'll be sending up to 3 participants my entry for this month's challenge!

What did I come up with for the July Challenge?

Pink Ginger Lime Salt Bars!

The detox ingredients for this recipe include pink himalayan salt, grated lime and ginger.  Usually fresh food additives are not recommended in soap recipes because they may cause the soap to develop Dreaded Orange Spots (DOS), which is a sign of rancid oils - the soap is still ok to use, just doesn't look as nice and if there is enough DOS it may change the smell.  However, the high salt content of these bars acts as a preservative to the very small amount of shredded ginger and lime.

This is a cold process soap, if you are unfamiliar with how to make cold process soap, please check out this free beginner's guide to soapmaking from the Soap Queen that introduces cold process soap making or try to attend a soap making class locally.  Safety is paramount when working with lye.


RECIPE:
I'm sorry I did not take any pictures of this process, I will do better next time!
Yield about 25 ounces of soap which fits in a one pound soap mold with extra to make sample bars in 2 to 3 individual 3 oz molds.

12.80 oz Coconut Oil
2.4 oz Olive Oil
.80 oz Mango Butter
4.8 oz distilled water
2 oz coconut milk
2.36 oz Sodium Hydroxide (lye)
1 oz ginger lime fragrance oil
14 oz fine grain pink himalayan salt

Soapmaking tools (bowls, spatulas, swirl tools, scale, thermometer, rubber gloves, goggles, apron, closed toe shoes)

OPTIONAL ITEMS
1 tsp grated ginger
1 tsp grated lime peel
1 tsp aloe vera 100x powder
1 tsp sodium lactate
pinch of silk fiber
tsp of chromium oxide dispersed in a tablespoon of thin oil (green)
tsp of bright yellow raincoat mica (from Mad Oils) or other bright yellow mica dispersed in a tablespoon of thin oil (yellow).

If you know anything about soap making, too much coconut oil can be irritating to skin and there is not a lot of other moisturizing oils to help this batch.  However, salt is a lather killer and coconut oil creates lots of bubbles, so the coconut heavy recipe helps to maintain some lather.  While the silk, coconut milk and aloe vera provide some skin conditioning properties.

Step 1: To use coconut milk, I freeze it in ice cube trays, then put them in a bowl and add the lye to create the lye solution.  But, to decrease scalding of the milk (some is needed to superfat the soap after trace), you can use 4.8 oz of water to make the lye solution.  I also add the silk fibers to the solution and stir ensuring they have all dissolved and set aside.  

Step 2: Combine and warm oils and butters in a separate bowl until everything is liquid.

OPTIONAL STEPS: While you wait for the next step to happen, here are some optional steps.  Warm the coconut milk a bit and add the aloe vera powder and sodium lactate.  Prepare your colors if you haven't already.  Make sure to have a separate container to mix each color into your soap batter.  I used 3 one for some uncolored soap, one for yellow and one for green.

Step 3: When both the lye water and liquid oils/butter reach between 90 and 105 degrees (and are within about 10 degrees of each other) Add the lye solution to the oils (never the other way around) and stick blend to a THICK trace.  Thick trace is necessary to keep the salt suspended.  

Step 4: Once you reach thick trace, add 2 oz of liquid coconut milk and mix until incorporated.  Add fragrance oil and mix until incorporated.  Using a spatula to mix, slowly add in your pink himalayan salt and optional grated ginger and lime.  Once fully mixed in, separate batter into containers for coloring.  Add the colors and mix well.

COLOR/MOLD/SWIRL: For my color combination, I poured the uncolored batter in the mold first.  Then I poured the 2 colors in simultaneously down opposite sides of the mold until full.  I used a gear tie, which is great because you can bend it to fit the mold, to do a hanger swirl.

Sodium lactate really helps to have them come out of the mold smoothly.  I did not include it in my first batch and I tried to unmold too soon....too, too soon...

That was a lot and pretty complicated for a non-soap maker.  But this month's challenge does not have to be soap - it just has to be an exfoliant with a detox ingredient.

To qualify to win one of my Pink Ginger Lime Salt Bars, there's still time to participate in the July challenge.  The rules and details are in the Facebook group, just send a request. to join. 

That's all for now Love Buds.  Until next time ~

Peace, Love & Lots of tangy exfoliating Bubbles!

A.  

Soap Troubles and Triumphs...hopefully


What's Good, LoveBuds?

If you're following me on Instagram and Facebook (you should be following me on Instagram and Facebook), you have seen my early forays into cold process soapmaking.

I really have fun appreciating this art form, but I have (had) retired from serious product making years ago.  I really enjoy the problem solving aspects of researching, creating and trying new and different bath and body recipes, but that is the fun part for me.  Once I've created a good product, I want to move on and try something new.  As a retail shop owner, your clientele wants you to keep creating that same stuff over and over again - For me it became very frustrating which started to outweigh the rewards and this was a contributing factor in my shutting my company Shea Essentials.

One of my greatest accomplishments once I began creating handmade soap, was participating in the Bramble Berry Soap Swap and being featured prominently on the Soap Queen's blog post about it back in 2011

Photo Credit: www.SoapQueen.com

Photo Credit www.SoapQueen.com

See my grapefruit lilly soap??!?!?  I was so excited!  Flash forward to now...I'm minding my business and I get an e-mail from the Soap Queen herself, advertising a soap making kit to make a simple blueberry soap.  I'm not sure why I took this particular e-mail as a challenge.  I get these kinds of things from suppliers all the time.  But this blueberry soap, had to be made and I was gonna do it!  And by golly, I'll be the belle of the ball during the Fall 2016 Bramble Berry Soap Swap!

I purchased the components of the kit that I did not already own and set out to replicate this gorgeous soap.

 What I created was not quite it....

My soap, to which I added sodium lactate to harden it, which was included as an optional step in the recipe, went in the mold teal green, instead of the beautiful creamy light blue in Anne-Marie's creation.  But it was still a cute color.  However, out of the mold, when I tried to cut it just 24 hours after making it, it crumbled...the ruins of my pipe dreams of just quickly whipping up a perfect soap.

My next attempt...Color looks good....
 Now this is starting to look like Anne-Marie's.  Yes, I can do this....

Well, almost.  The instructions warned about not letting the soap gel, but I fumbled and forgot to put it in the freezer and then went back and stuck in the freezer with the resulting soap.  Many have paid me compliments saying it looks unique, like there is a big blueberry in the middle of the soap.  I appreciate all the feedback, but it's not quite what I was going for...so I'll be revisiting this recipe again.

In the meantime, I've tried a few different types of soap, a few different fragrances, and those I am sharing all the time on Instagram and Facebook.  So check out my journey.  I'm not quite sure what I am going to do with all this soap.  Some friends say sell it, if I do, it will be at discount prices just so I can keep experimenting, I definitely won't be making the same soaps over again and I won't be opening an official "store".  I really enjoying sharing my love of lather with you, exploring new and different brands and now maybe even new and different soap techniques.  We'll see how this looks in a few weeks along with my other attempts.

If you're interested in creating handmade bath and body products, consider joining the DIY Hair, Bath & Beauty Facebook Group.  I lead a DIY challenge there each month and its for anyone from novices to experts.  We just share a love of Doing It Our (your) selves.

That's it for now,

Until next time~

Peace, Love and Lots of perfect (not half gelled) blueberry scented Bubbles!

A.

Friday Feature: Tear Drop Technique by Kapia Mera Soap Co.


What's up, Love Buds?

I'm starting to do a bit of experimenting with cold process soaps and I'll be posting soon with the deets on what's been happening so far, but for today, I want to show you some amazing soaping in action.

Holly does an amazing job demonstrating the tear drop technique and you bet, I'm gonna try it for better or worst!


BEAUTIFUL!!!!!!! 

That's it for #featurefriday.  Until next time,

Peace, Love and Lots of peacock feather looking, gorgeous tear dropped BUBBLES!

A.

Visit Kapia Mera Soap Co.

     On YouTube
     On the Web
     On Etsy
     On Facebook